
In order to upload your own LED code to the Rainbow Clock, you’ll need to install the Arduino IDE. This page will walk you through setting up the Arduino IDE to be ready to upload code to the rainbow clock.
1. Download and install the Arduino IDE
There are two versions of the Arduino IDE: the newer Arduino IDE 2 and the Legacy IDE (1.8.X). Arduino IDE 2 is recommended but has specific operating system requirements, so the Legacy IDE is a good alternative for older systems.
- Arduino IDE 2 software download page (recommended!)
- This page will not cover downloading and installing the software. Arduino has a guide for that here.
- Legacy IDE (1.8.X) software download page
Once you have the Arduino IDE installed, launch it, and it should look like this:
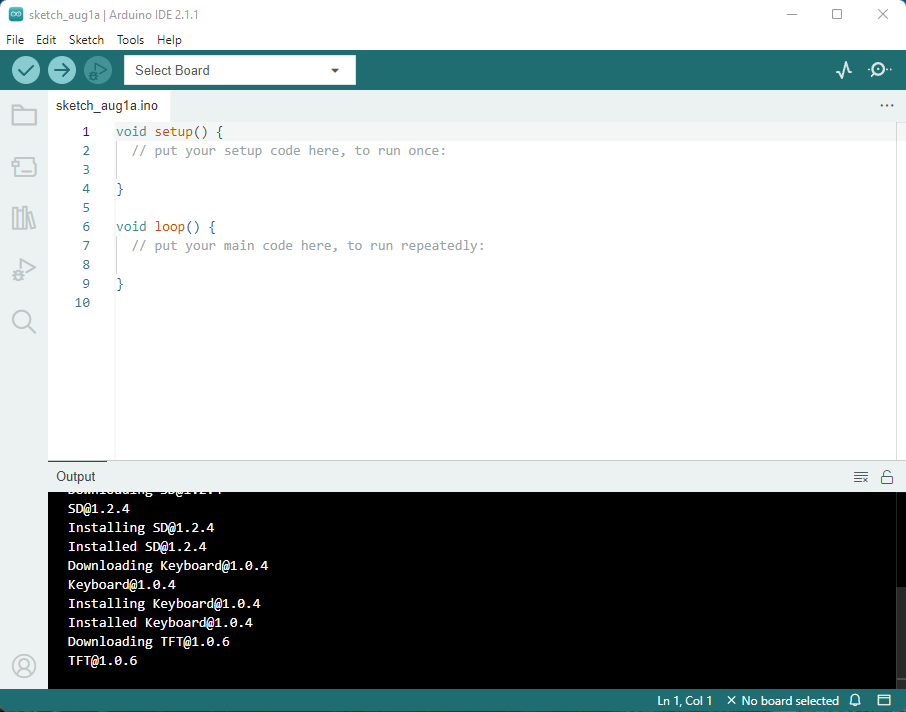
You now have the Arduino IDE installed!
2. Add the ESP32 board within the Arduino IDE
Now that you have the Arduino IDE, you’ll need to install the ESP32 board add-on within the IDE. (An ESP32 is a microprocessor just like an Arduino. The IDE comes ready to upload code to Arduino boards, but the ESP32 boards are special and need to be added separately.)
(Disclaimer: The steps and screenshots below are based directly on this guide: Installing ESP32 Board in Arduino IDE 2, with all screenshots freshly taken for this content.)
(If you have Legacy IDE 1.8.X, the steps are the exact same, but the screenshots won’t quite match. Here’s a guide specifically for Legacy IDE: Installing ESP32 Board in Legacy Arduino IDE 1)
To add ESP32 to Arduino IDE:
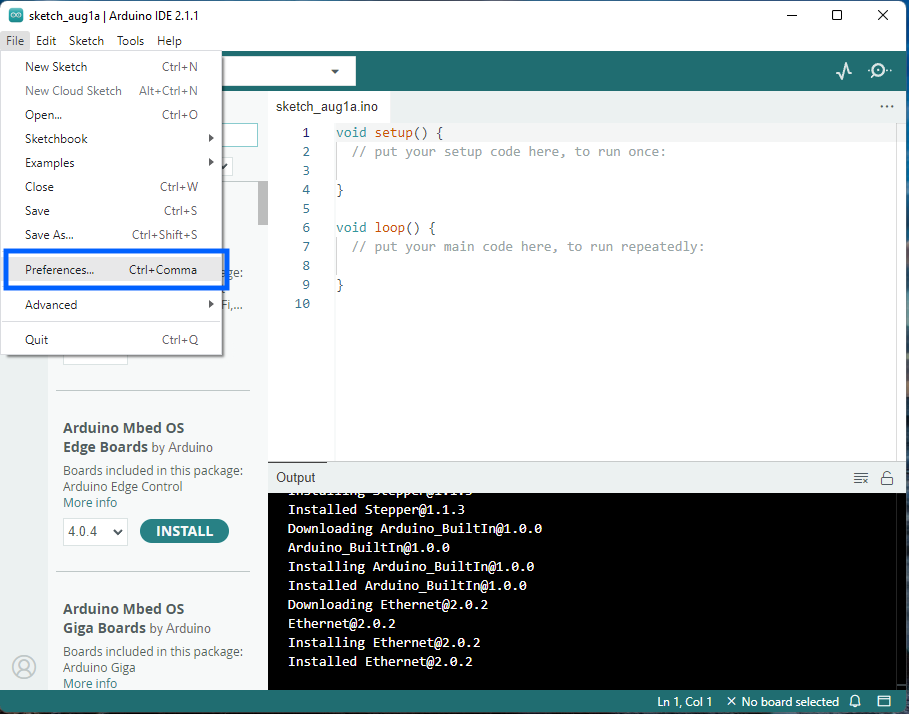
2a. Open Preferences
Go to File > Preferences for Windows users. For Mac users: Arduino IDE > Preferences.
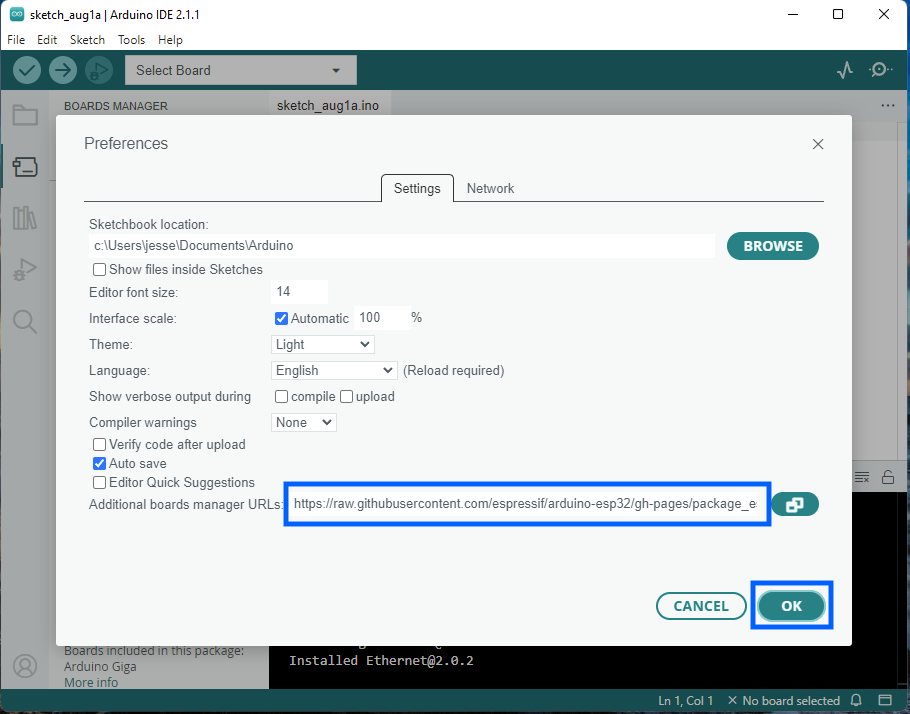
2b. Paste this link
Copy and paste the following line to the Additional Boards Manager URLs field. Press “OK” to confirm.
https://raw.githubusercontent.com/espressif/arduino-esp32/gh-pages/package_esp32_index.json
Note: if you already have the ESP8266 boards URL, you can separate the URLs with a comma, as follows:
http://arduino.esp8266.com/stable/package_esp8266com_index.json, https://raw.githubusercontent.com/espressif/arduino-esp32/gh-pages/package_esp32_index.json
2c. Open the Boards Manager
On the left side, click the Boards Manager icon. (Or you can go to Tools > Board > Boards Manager...)
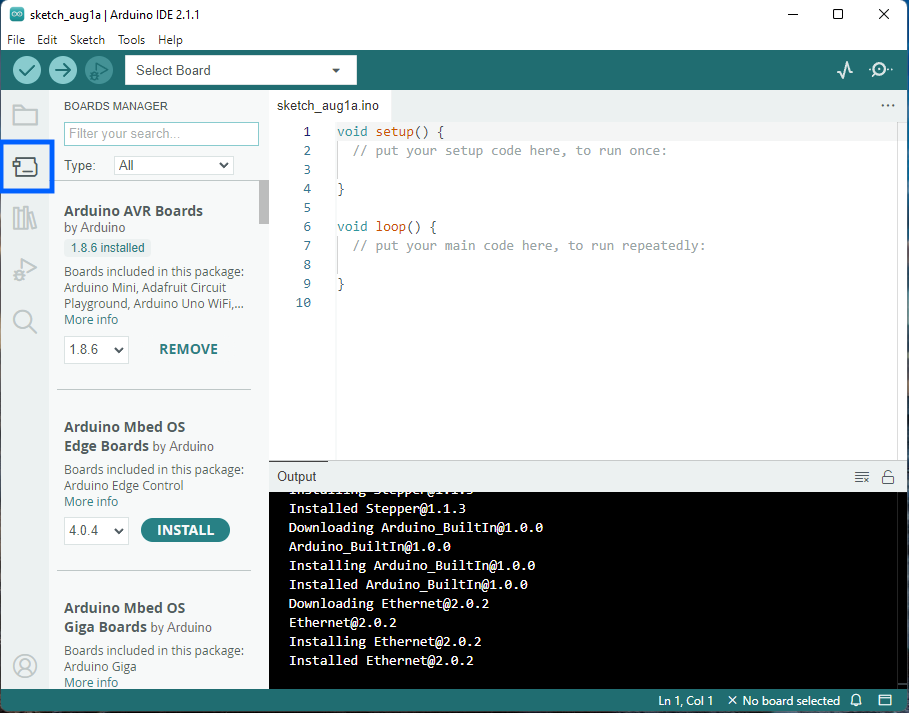
2d. Search ESP32, Install
Type “ESP32” in the search field. Locate esp32 by Espressif Systems. Click Install. (This screenshot has a “Remove” button because it is already installed in this case.)
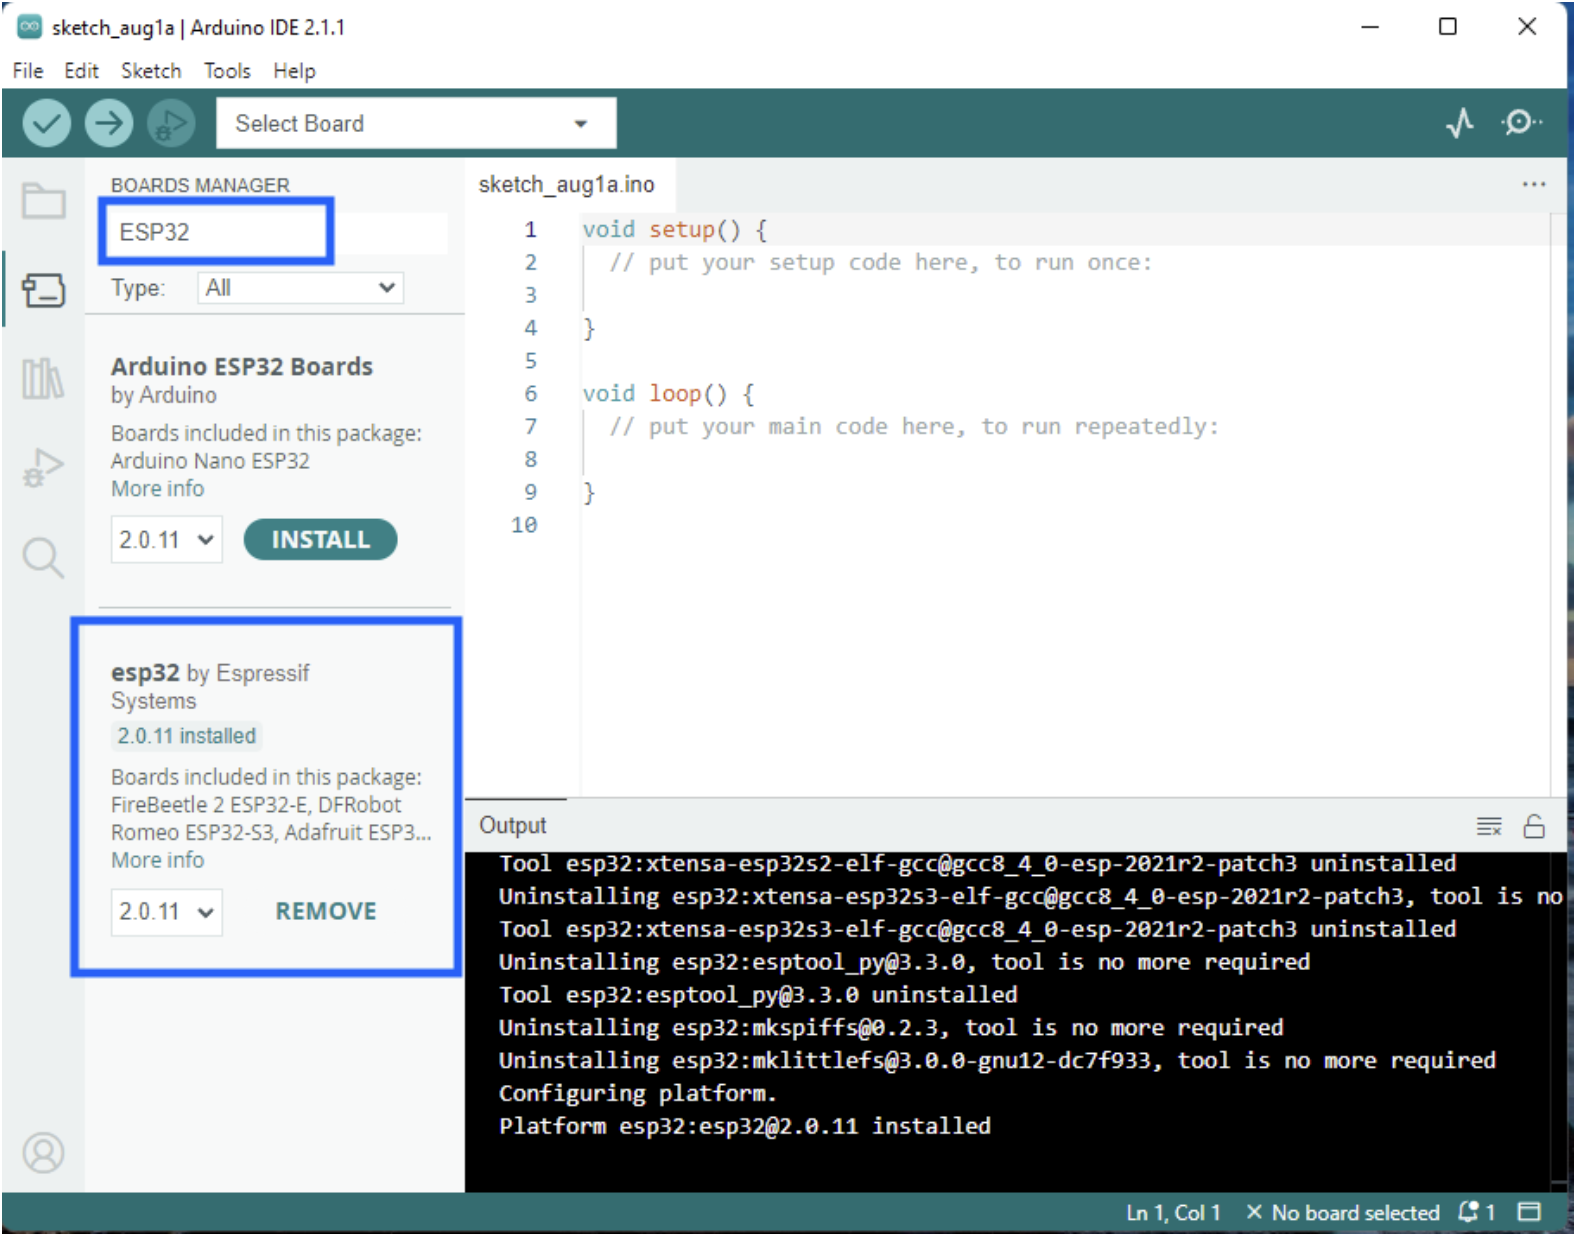
You now have the ESP32 board added!
3. Install LED and Time libraries from the Arduino libraries manager
The rainbow clock code uses two libraries:
- FastLED: For controlling addressable LEDs.
- ESP32Time: For setting and retrieving internal RTC (Real Time Clock) time on ESP32 boards.
Conveniently, you can install these libraries using the Arduino IDE!
3a. Open Arduino library manager
On the left side, click the Library Manager icon. (Or you can go to Tools > Manage Libraries.)
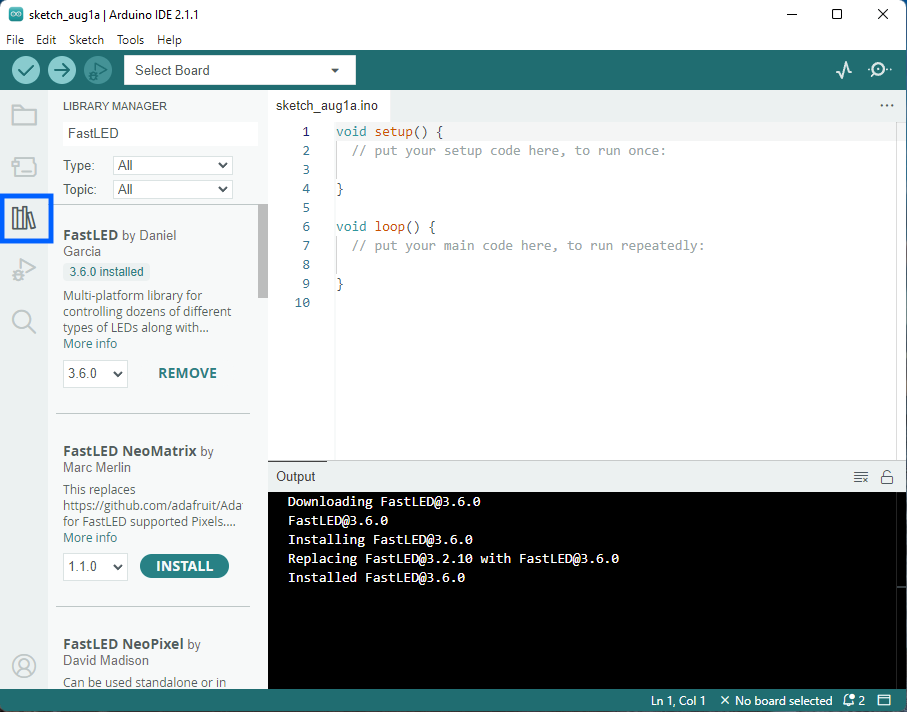
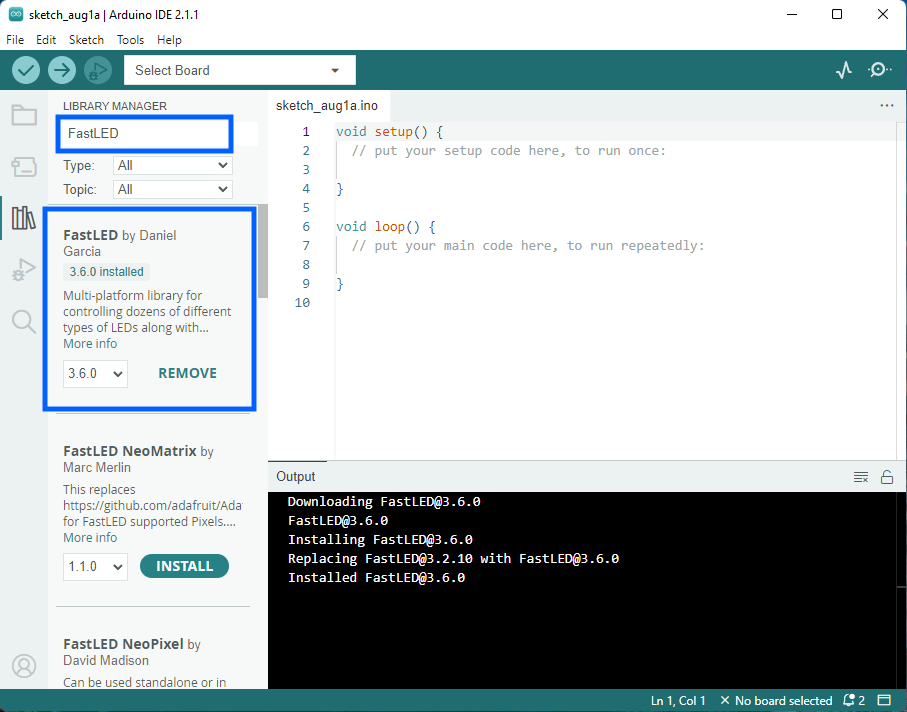
3b. Search for “FastLED”. Find FastLED by Daniel Garcia. Click Install.
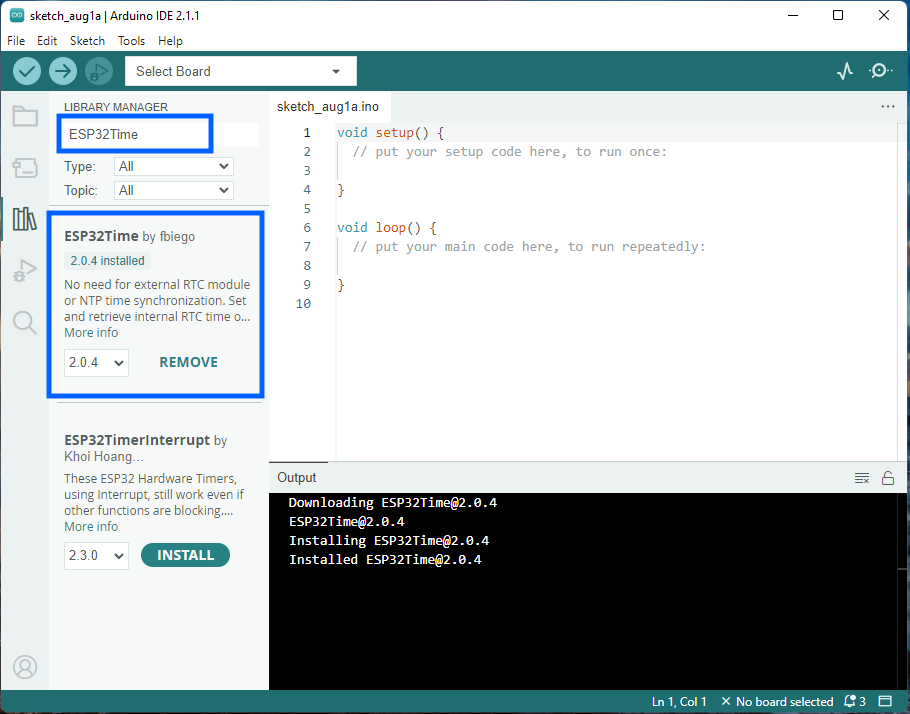
3c. Search for “ESP32Time”. Find ESP32Time by fbiego. Click Install.
4. Test uploading code to the Rainbow Clock
To make sure you have everything set up correctly, we’ll upload some test code to the Rainbow Clock’s ESP32 board. This test code prints the words “hello world!” every 1 second to the Serial monitor.
(Again, these steps and screenshots are copied from this guide, except with different test code.)
4a. Paste this test code
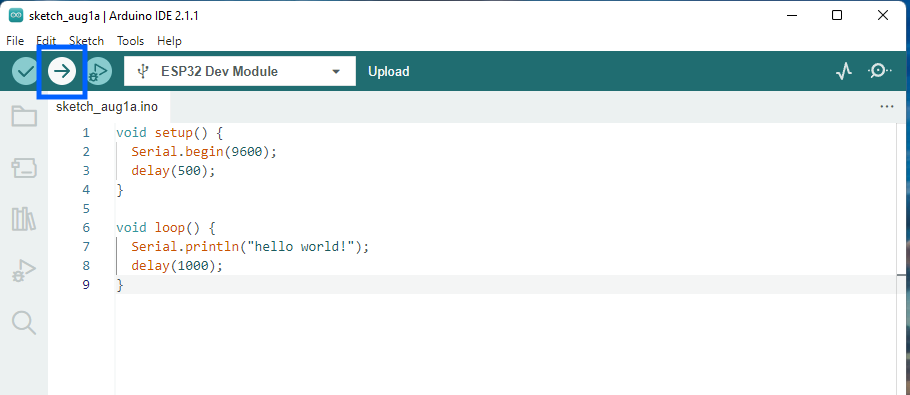
In the main text area, delete all the pre-filled code, and paste the following.
void setup() {
  Serial.begin(9600);
  delay(500);
}

void loop() {
  Serial.println("hello world!");
  delay(1000);
}
4b. Select your board
Make sure your Rainbow Clock is plugged into your computer. On the top drop-down menu, click the “Select Board” dropdown. Click Select other board and port…
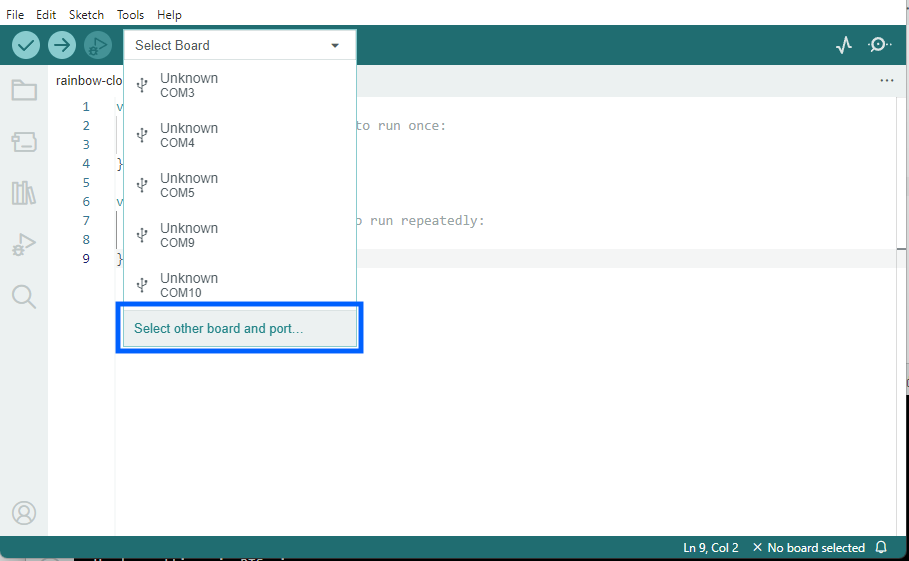
A new window will open:
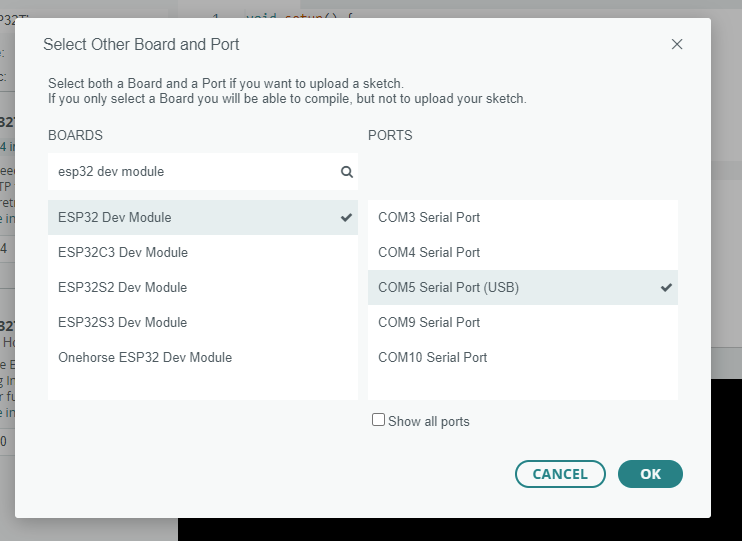
Under “BOARDS” on the left, type “esp32 dev module” to filter, and then select ESP32 Dev Module.
Under “PORTS” on the right, select your board. It may have a different name other than COM, like /dev/cu.SLAB_USBtoUART, or /dev/cu.usbserial-0001. If you’re not sure which one to select, unplug the Rainbow Clock from your computer, then plug it back in, and see which option appears.
Click “OK” to confim.
4c. Click the upload button
At this step, your computer might prompt you to download and install python3. You’ll need to allow it, as python is needed to upload to ESP32 boards. If you’re getting stuck on this step, this guide has more detailed steps regarding python.
4d. Open the serial monitor to see the output
Verify that the code is running on the Rainbow Clock’s ESP32 by opening the Serial Monitor. Tools > Serial Monitor
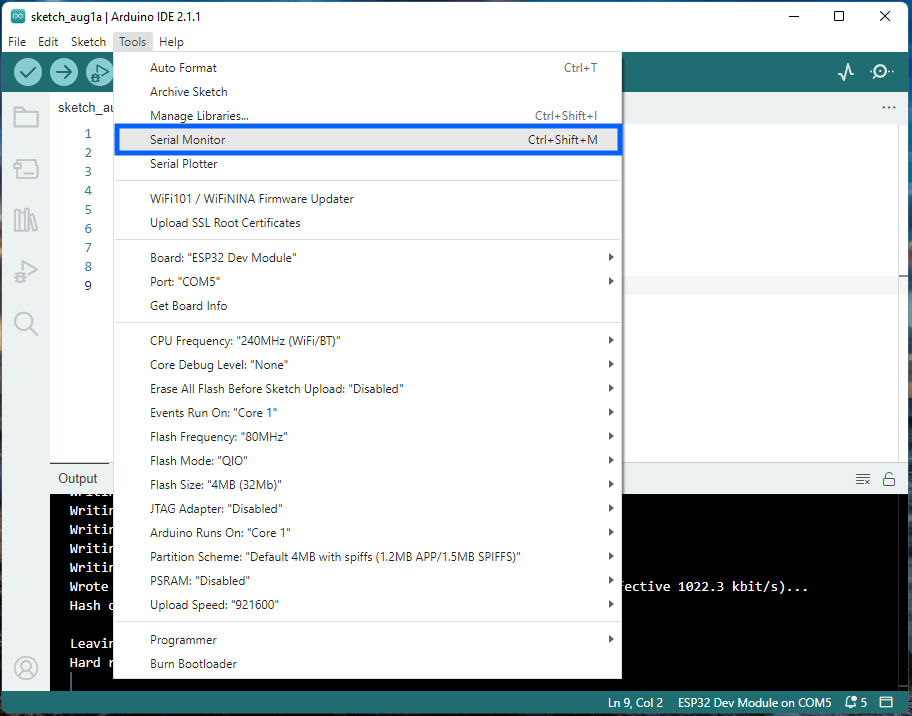
The serial monitor shows up at the bottom below the code editor:
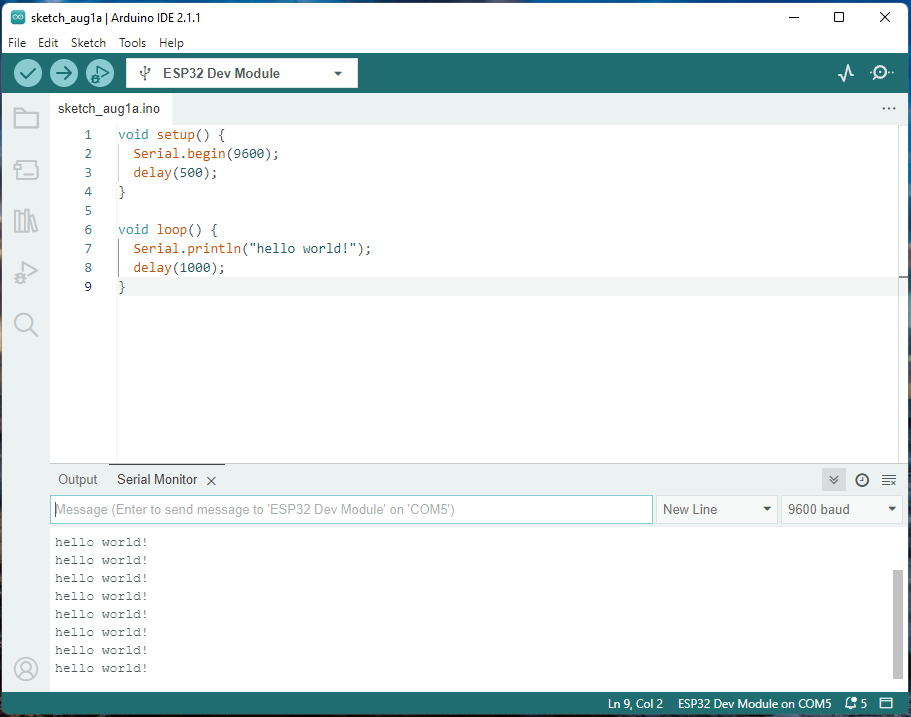
If you see “hello world!” printing every 1 second in your Serial monitor, it’s working! YOU DID IT! :) It might not be obvious, but this “hello world” code is running on your Rainbow Clock’s ESP32.
(If you see text but it’s random characters/jargon, make sure you select “9600 baud” on the right side of the serial monitor. 9600 should be the default.)
Now that you know how to upload code to the Rainbow Clock, you can start writing your more fun LED code!
Go to the next section! Code simple LED grid patterns