
If you’ve uploaded your own code to the Rainbow Clock and you want to go back to its original function as a clock, this page will walk you through how to upload the original clock code.
Steps
-
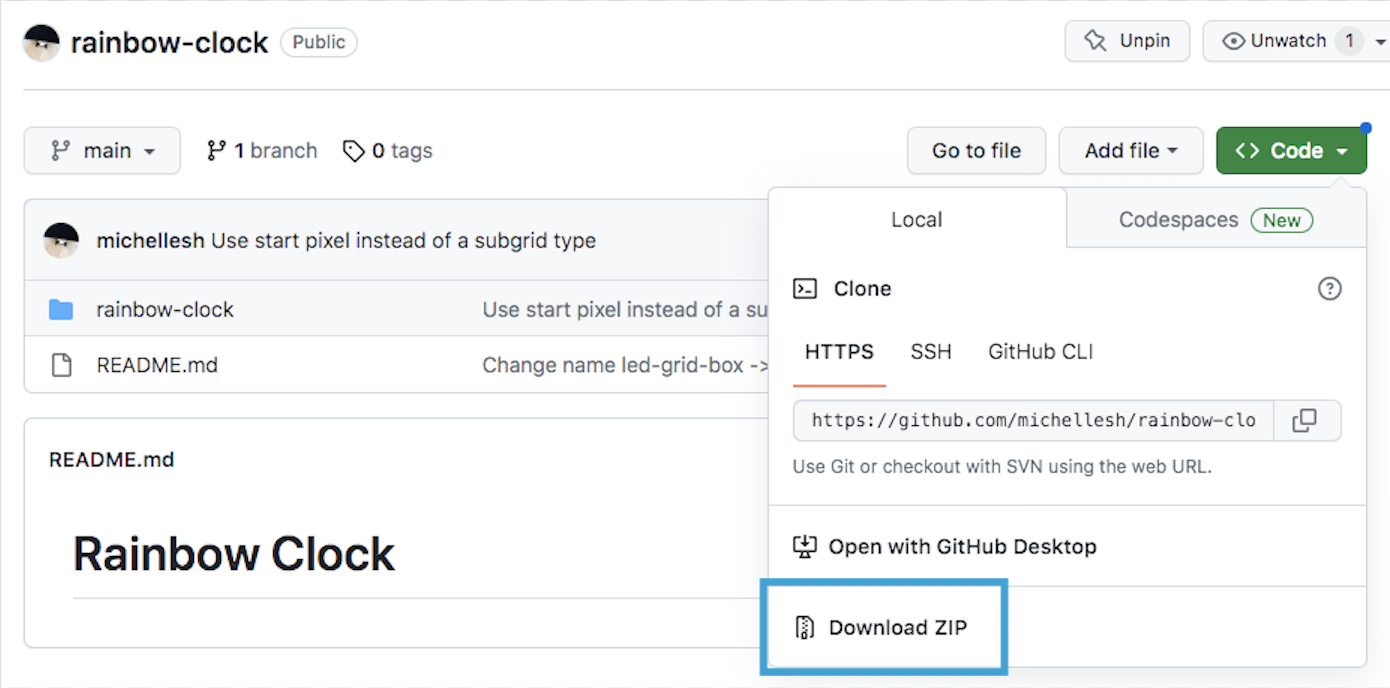
Click the green “Code” button -> Download ZIP
-
Unzip and open the folder called
rainbow-clock-main -
Open the file
rainbow-clock/rainbow-clock.inoin the Arduino IDE. If you don’t have the Arduino IDE installed, you’ll need to follow at least the first three steps on the Setup environment page to install the Arduino IDE, add the ESP32 board within the IDE, and install the libraries FastLED and ESP32Time. -
Make sure you set the right
START_PIXELset according to if your grid’s starting pixel is on the bottom left or top left. You can open your clock to check this, or you can just try one and see if the numbers are displayed upside down!In the file
rainbow-clock/rainbow-clock.ino:#define START_PIXEL LEDGrid::TOP_LEFT // or LEDGrid::BOTTOM_LEFT -
Connect the Arduino IDE to your clock’s ESP32. Make sure your Rainbow Clock is plugged into your computer. On the top drop-down menu, click the “Select Board” dropdown. Click Select other board and port…
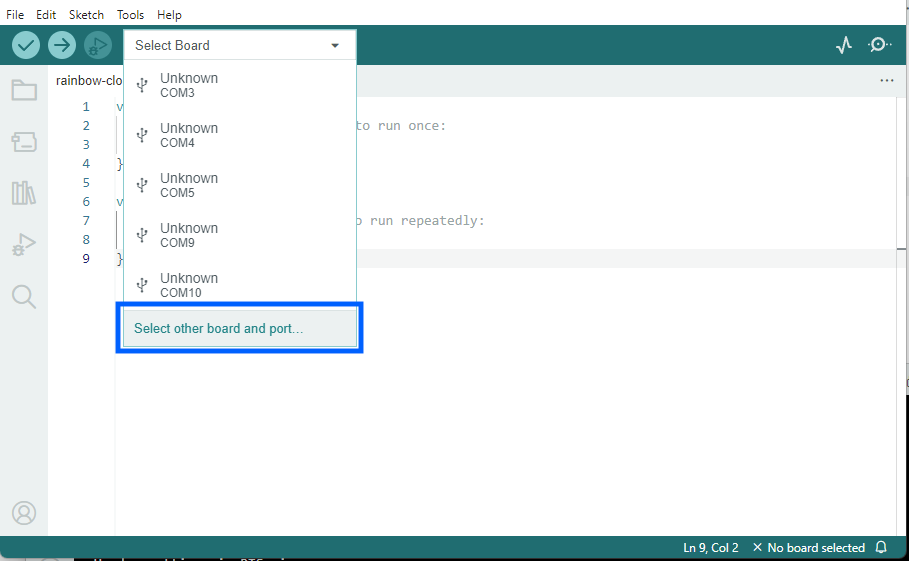
A new window will open:
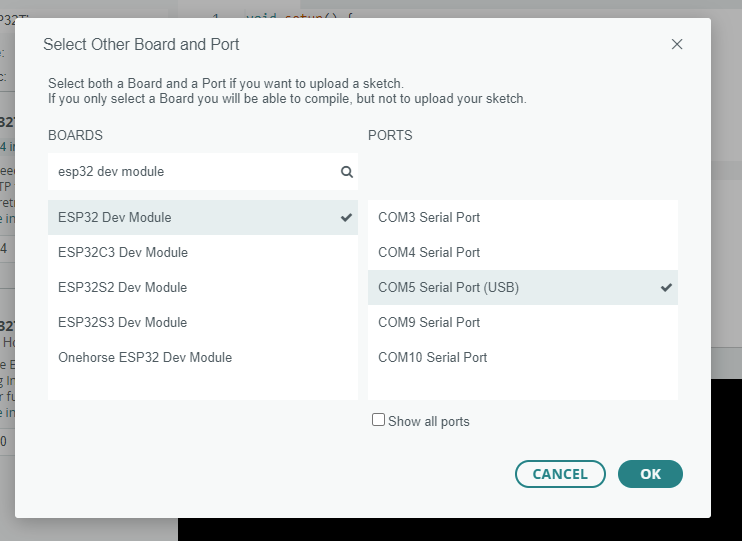
Under “BOARDS” on the left, type “esp32 dev module” to filter, and then select ESP32 Dev Module.
Under “PORTS” on the right, select your board. It may have a different name other than
COM, like/dev/cu.SLAB_USBtoUART, or/dev/cu.usbserial-0001. If you’re not sure which one to select, unplug the Rainbow Clock from your computer, then plug it back in, and see which option appears.Click “OK” to confim.
-
Click the upload button in the Arduino IDE.

At this step, your computer might prompt you to download and install python3. You’ll need to allow it, as python is needed to upload to ESP32 boards. If you’re getting stuck on this step, this guide has more detailed steps regarding python.