This page will walk you through how to code some basic LED patterns, starting with turning on a single LED. Each pattern adds a layer of complexity onto the last, while calling out essential utility functions like map() and delay().
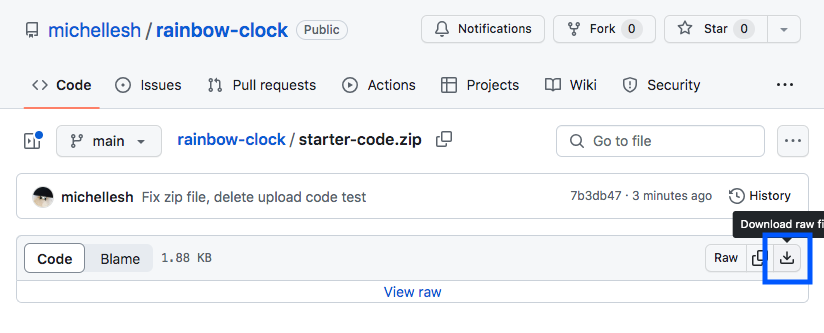
This will download a zip which contains two files. Once unzipped, open the folder. There should be two files in the folder: LEDGrid.h and starter-code.ino. Open the .ino file in the Arduino IDE.
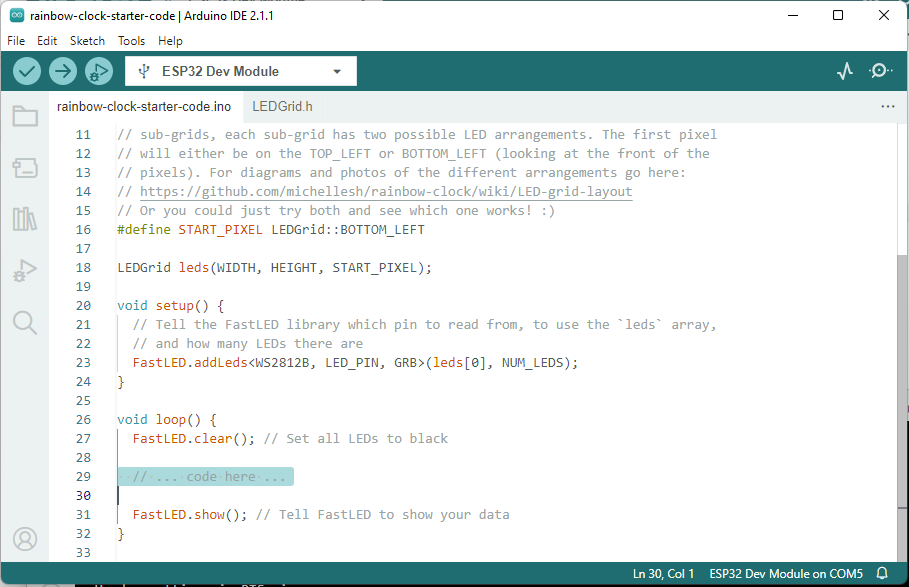
The rest of the examples on this page will assume that all of this surrounding starter code is present. When you paste code from each example below, paste below the comment: // ... code here ... (highlighted in the above screenshot)
Don’t delete any of the other surrounding code.
(You don’t have to understand all this surrounding code to start coding some LED patterns!)
Paste the above code into the Arduino IDE editor where you see the comment // ... code here .... (It doesn’t matter if the tabs/spacing is messed up, but if you want it to look pretty, you can press ctrl-t on Windows or cmd-t on Mac to auto-format.) Then click the upload icon!
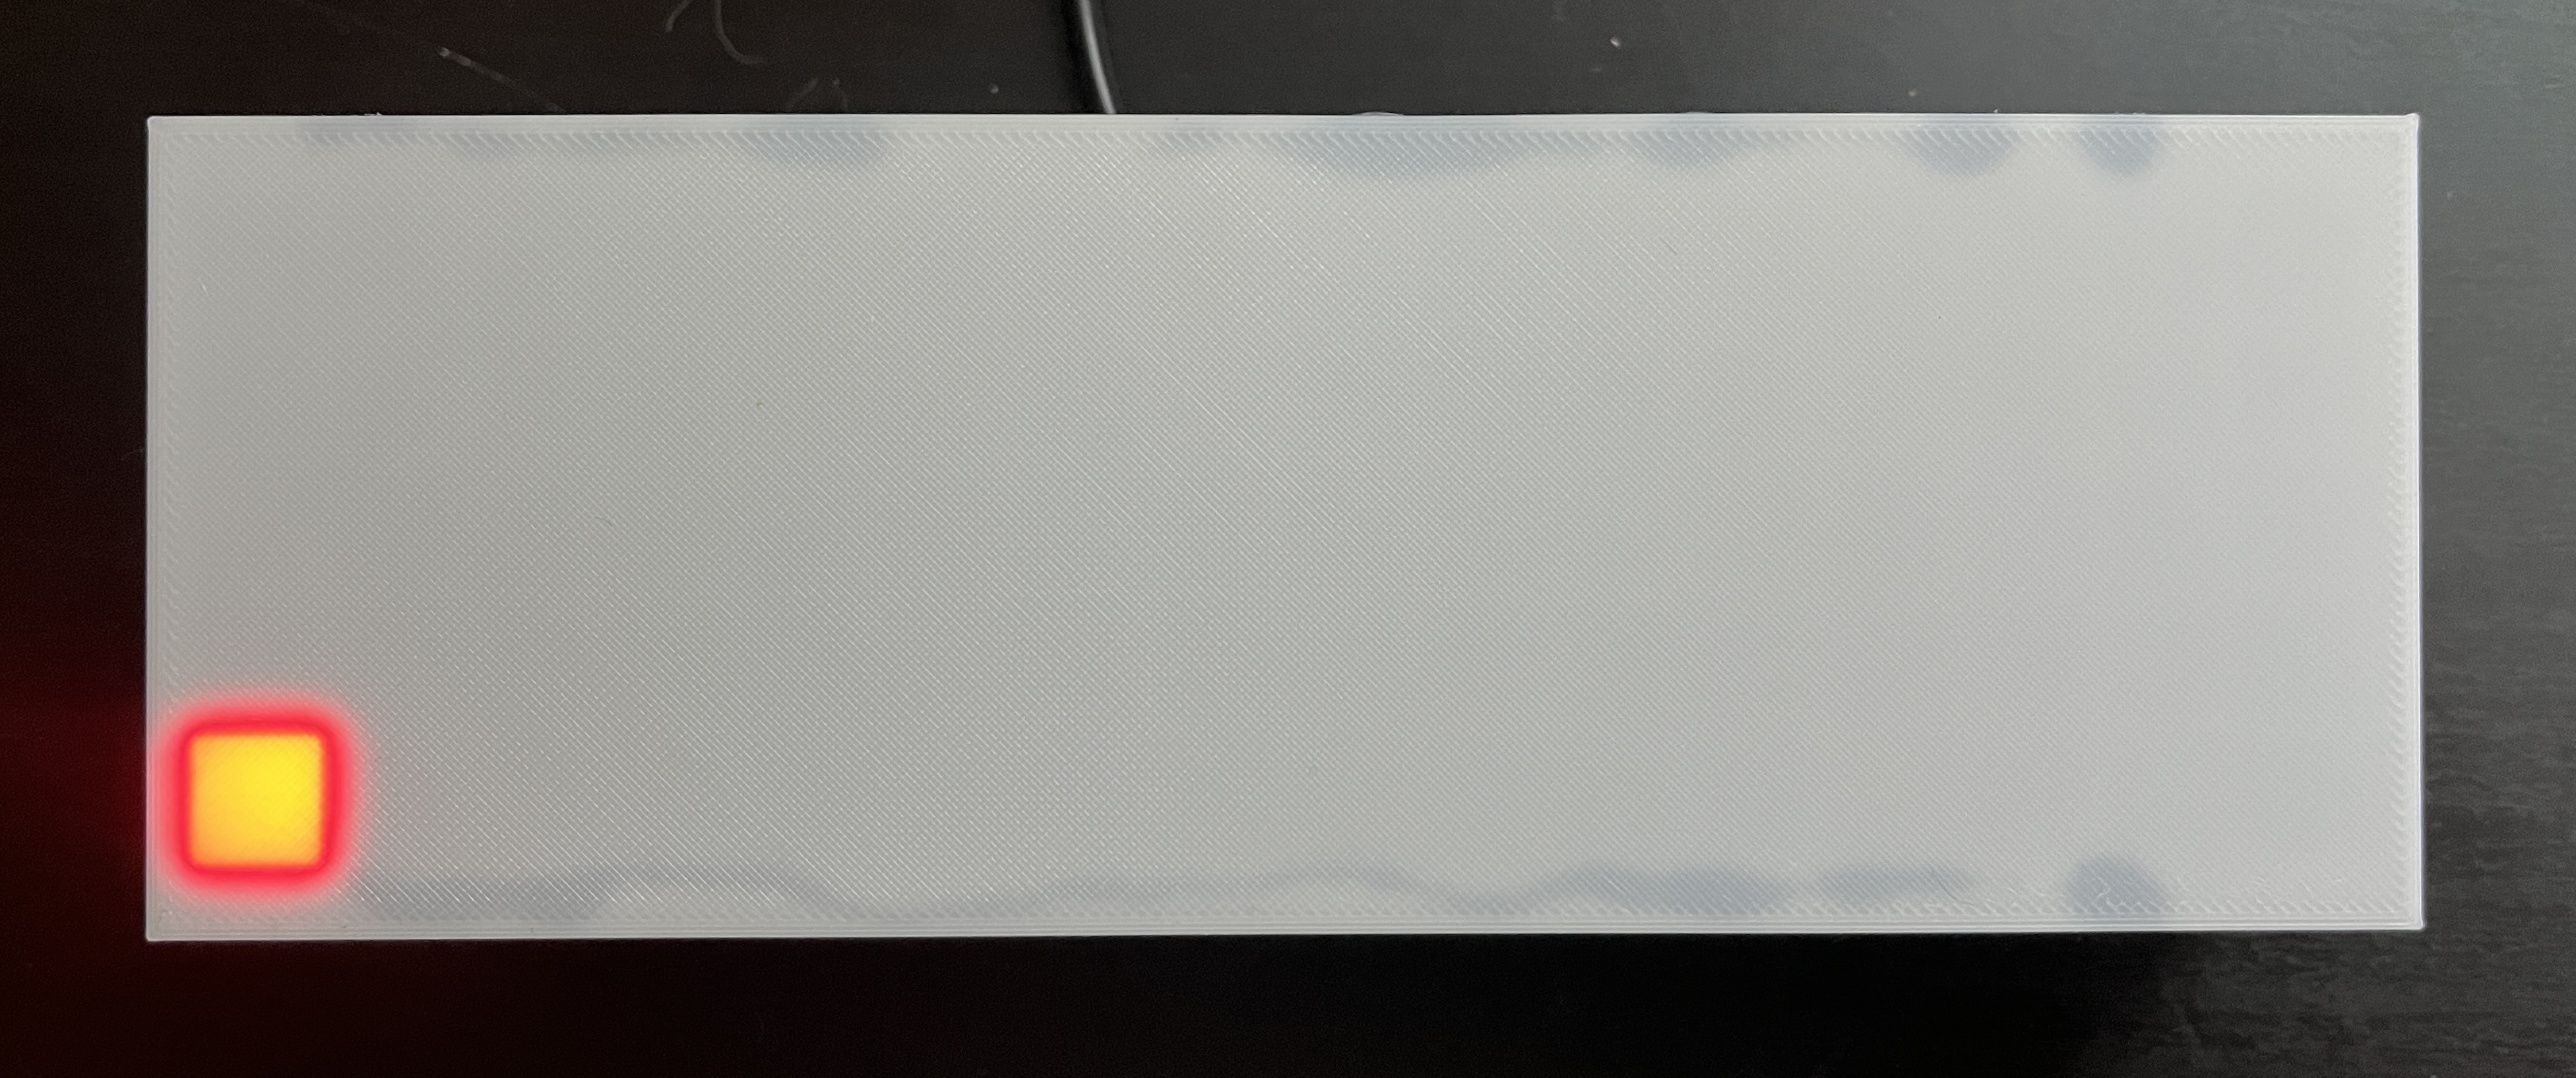
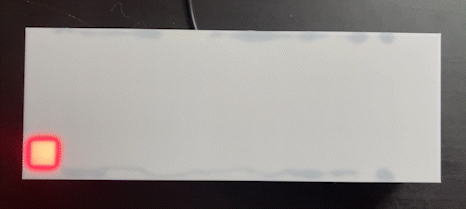
This code sets a single pixel at the (x, y) coordinate (0, 0) to Red. CRGB::Red is one of many pre-defined colors in the FastLED library. See the full list of FastLED predefined colors. Try changing CRGB::Red to CRGB::Blue or CRGB::Green!
NOTE
If the pixel that turned on is not at the bottom left, you probably need to change the START_PIXEL variable towards the top of the file.
#define START_PIXEL LEDGrid::TOP_LEFT // change to LEDGrid::BOTTOM_LEFT, or vice versa
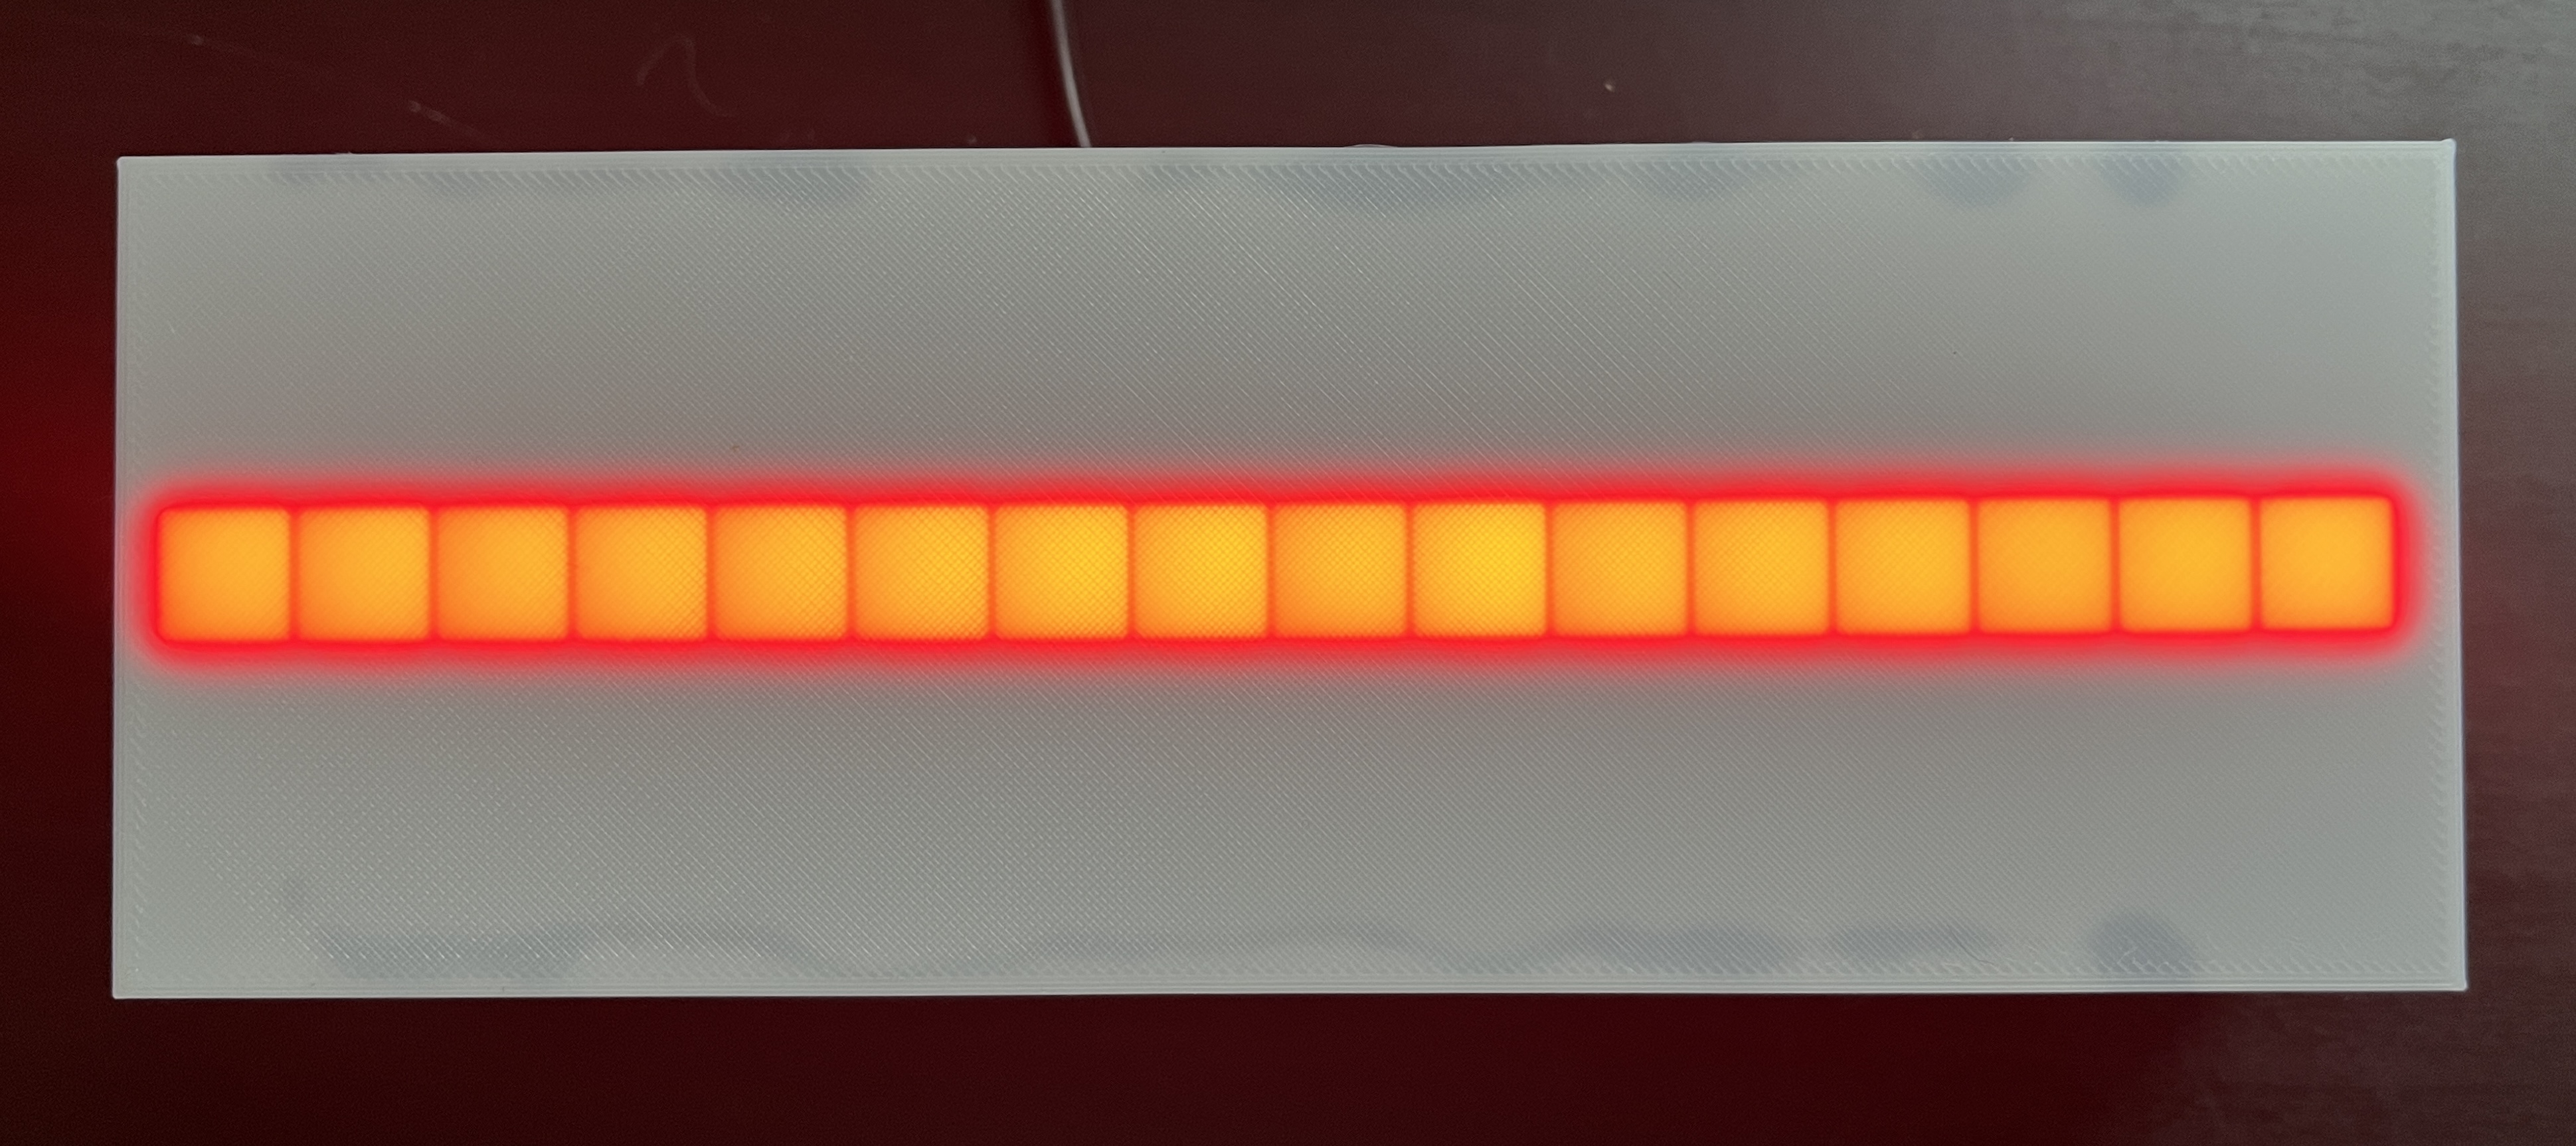
for (int x = 0; x < WIDTH; x++) { leds(x, 2) = CRGB::Red;}
This code loops through every value of x from 0 to WIDTH (which is 16) and sets the LED in row 2 at that x-coordinate to Red. (Detailed explanation of a for loop here.)
TIP
It doesn’t matter if the tabs/spacing gets messed up, but if you want it to look pretty, you can press ctrl-t on Windows or cmd-t on Mac to auto-format, or go to Edit > Auto Format.
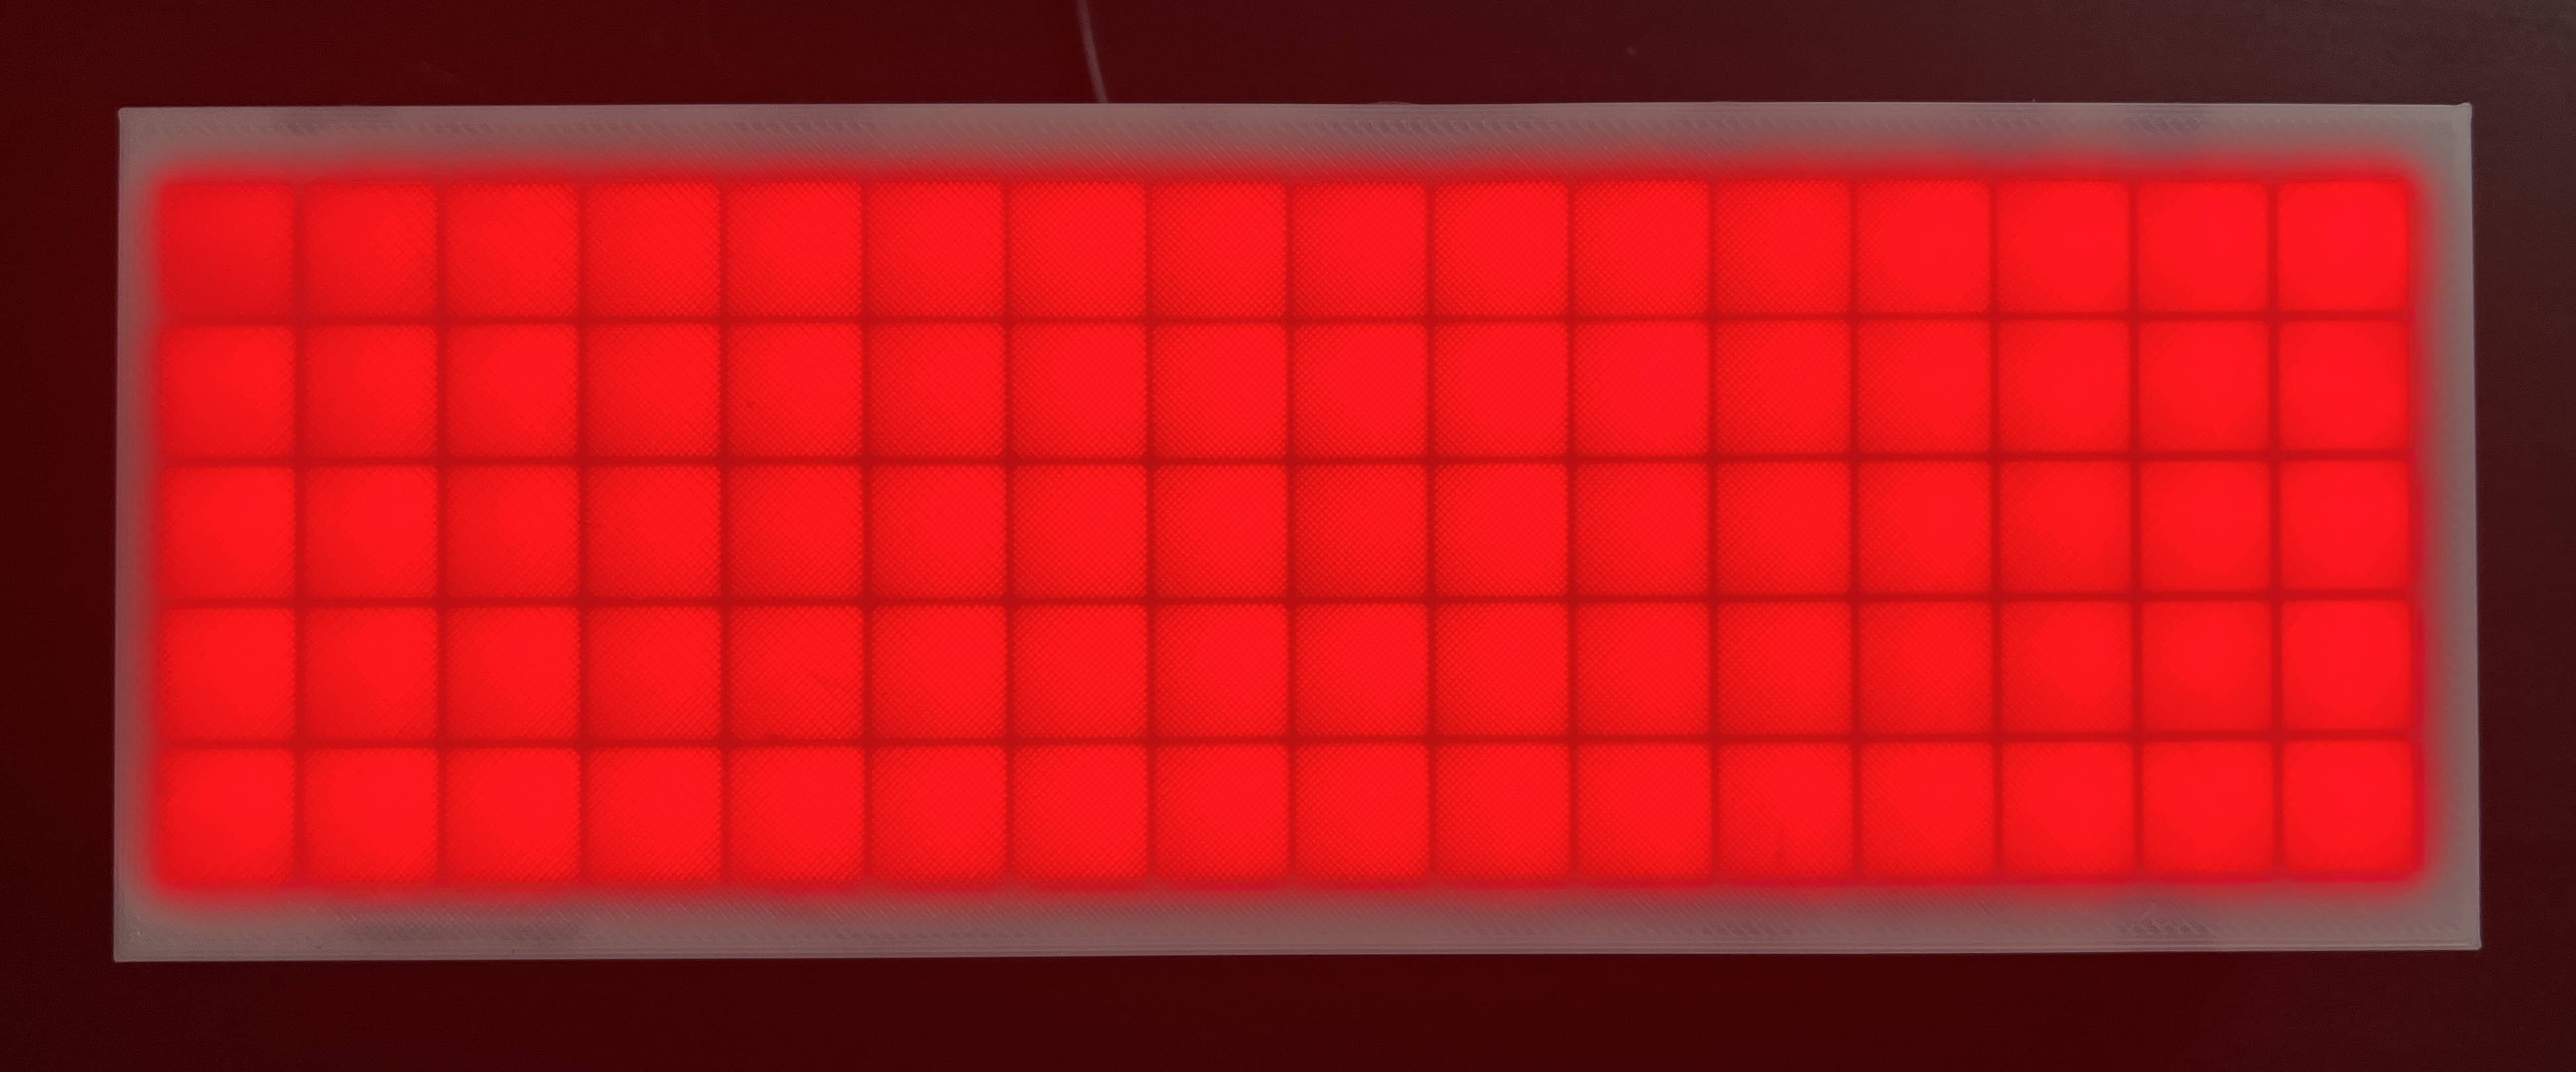
for (int x = 0; x < WIDTH; x++) { for (int y = 0; y < HEIGHT; y++) { leds(x, y) = CRGB::Red; }}
A doublefor loop! This one still loops through every value of x, and for each value of x, loop through every value of y from 0 to HEIGHT (which is 5). You can also think of x as column and y as row.
In addition to predefined colors like CRGB::Red, FastLED also allows you to set colors using two color models: RGB, and HSV (aka HSL). You can define these with the respective functions CRGB(red, green, blue) (CRGB documentation) and CHSV(hue, saturation, value) (CHSV documentation).
colorpicker.me is a useful and fun tool for understanding how colors are defined and for discovering new colors! Also keep in mind that not all colors map perfectly to LEDs. For instance you might find a nice light purple on colorpicker.me, try to send its RGB values to the LEDs, and get a boring dim white-ish color.
Here we define three variables red, green, and blue and set their values between 0-255. The following code sets all LEDs to the RGB color (9, 105, 218) (a rich blue color)
int red = 9;int green = 105;int blue = 218;for (int x = 0; x < WIDTH; x++) { for (int y = 0; y < HEIGHT; y++) { leds(x, y) = CRGB(red, green, blue); }}
hue, saturation, and value are all values between 0-255 in FastLED, but a typical HSV color has different ranges. Hue is usually a value 0-360 (as in 360 degrees on a color wheel), and saturation and value are usually percentages 0-100. To get the same blue color we got above as an RGB, we take the hue from colorpicker.me, which is 212 and we convert it from the 0-360 range to the 0-255 range: 212 * 255 / 360. Similarly we take the saturation and value 92% and 85% and convert them to the 0-255 range: 92 * 255 / 100 and 85 * 255 / 100.
int hue = 212 * 255 / 360;int saturation = 92 * 255 / 100;int value = 85 * 255 / 100;for (int x = 0; x < WIDTH; x++) { for (int y = 0; y < HEIGHT; y++) { leds(x, y) = CHSV(hue, saturation, value); }}
(Note that these RGB and HSV blues might be slightly different. The RGB <> HSV conversion is not perfect. You can see this for yourself in colorpicker.me if you try increasing or decreasing the “G” or “B” values by one, sometimes the HSV stays the same. So there could be multiple RGBs for a single HSV.)
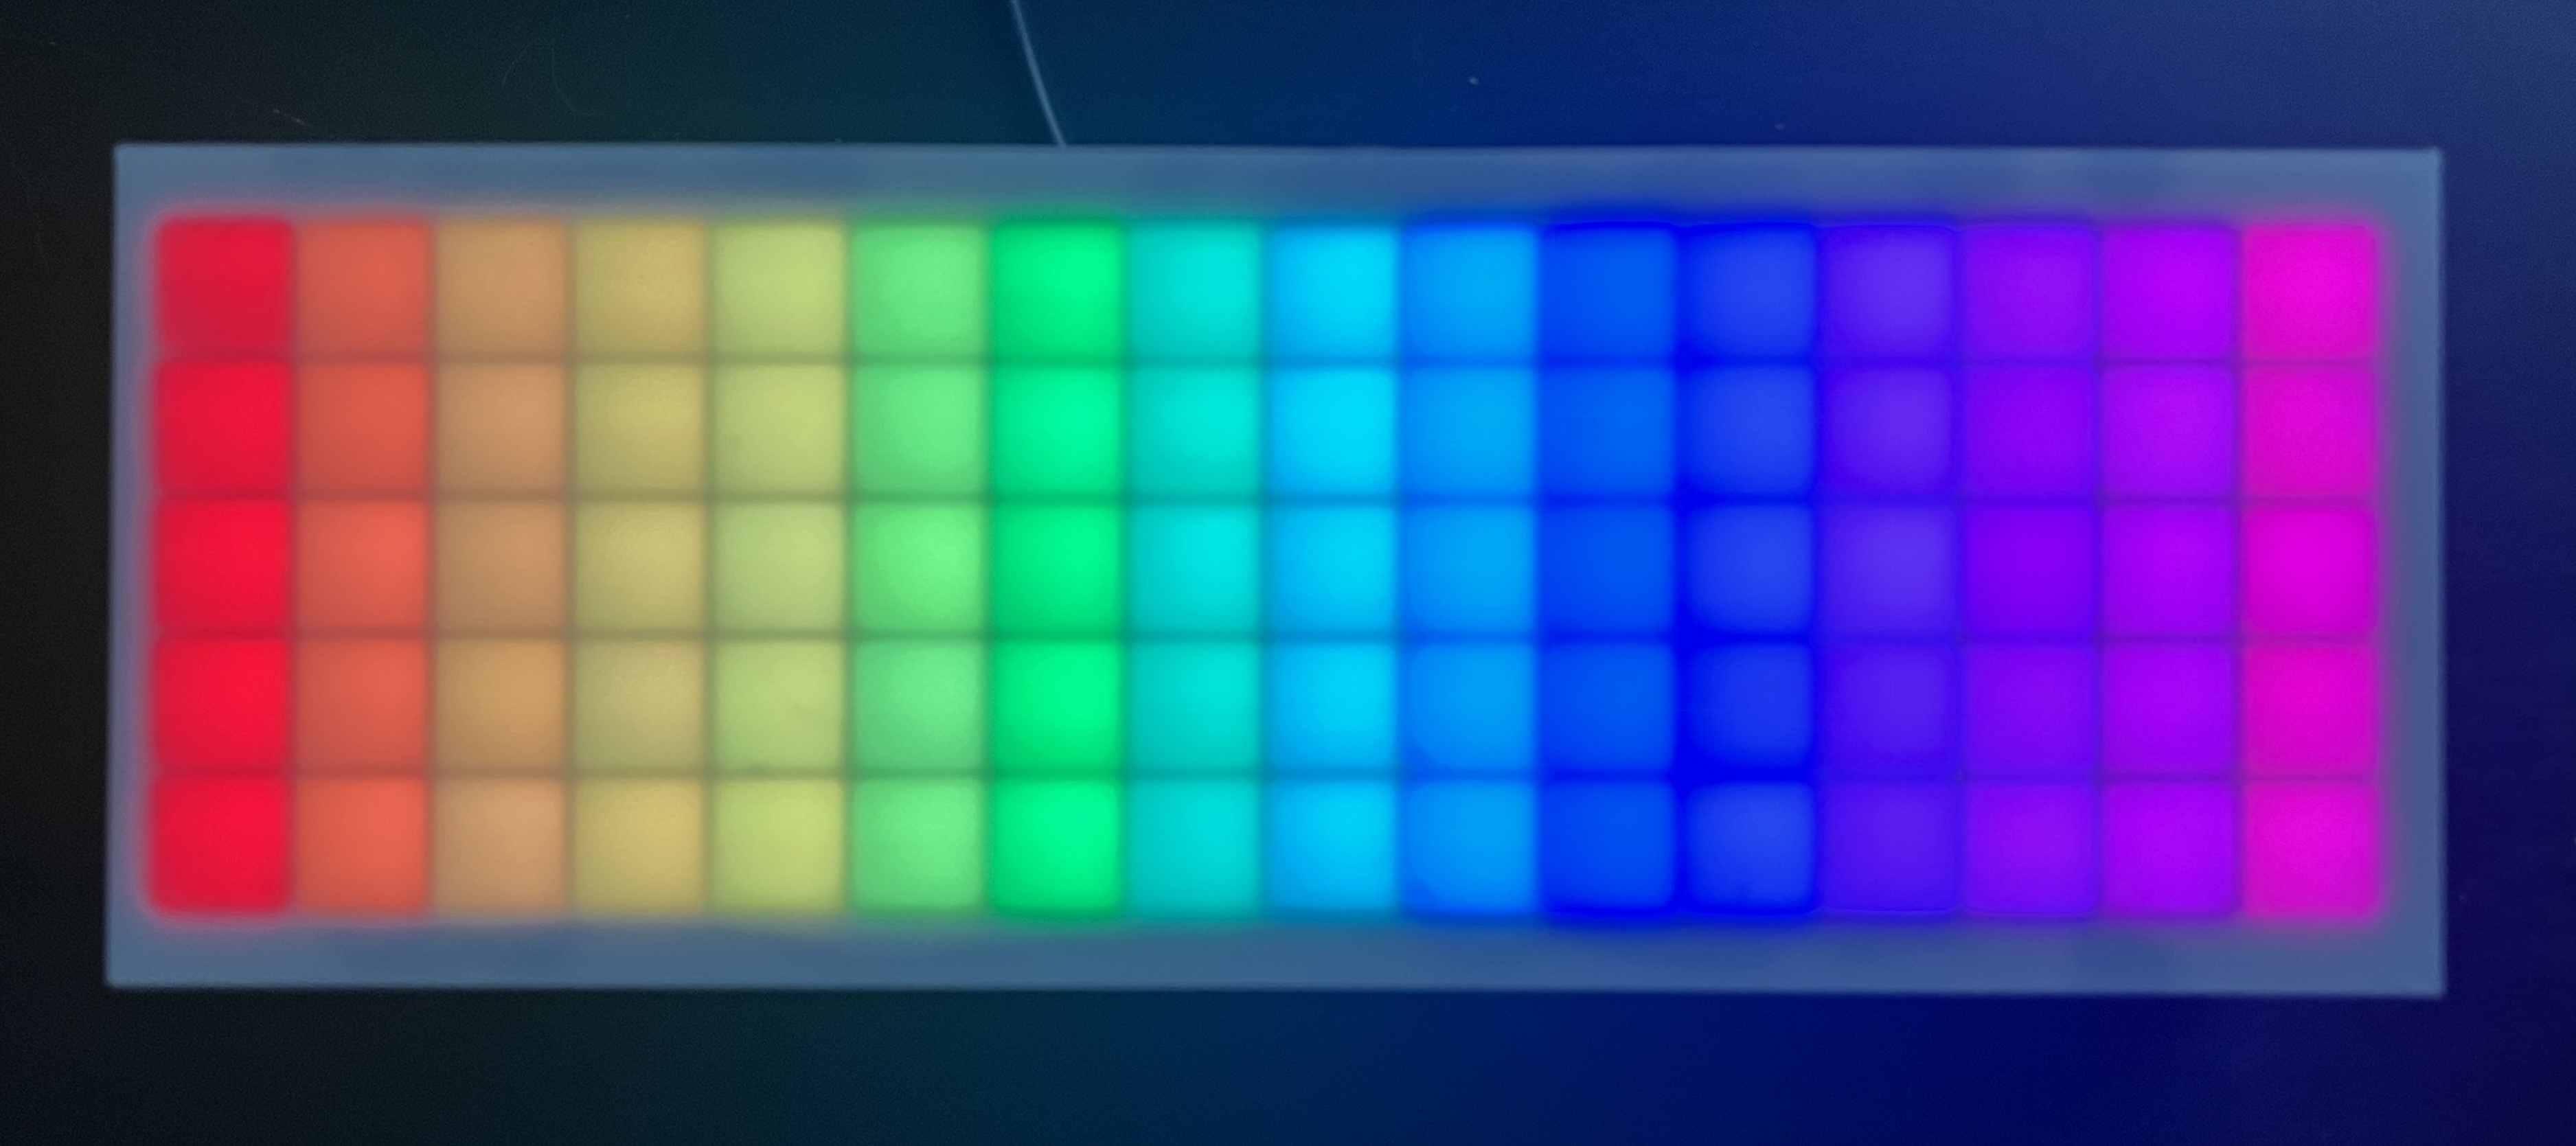
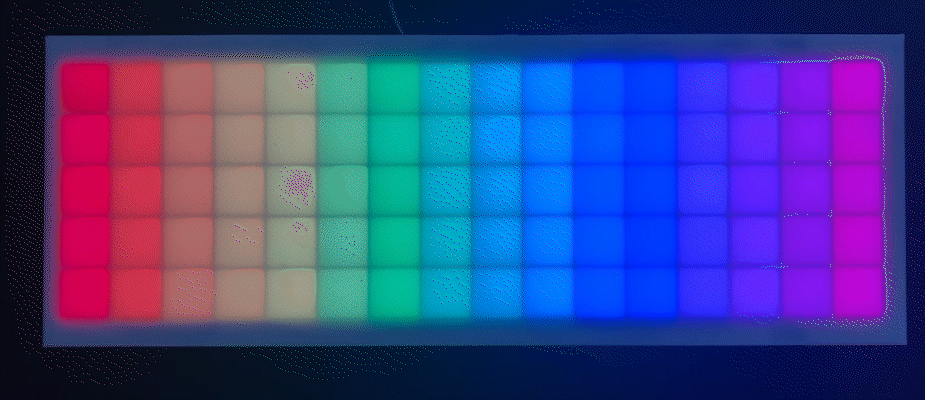
This one sets each pixel to a custom CHSV color instead of a pre-defined color like Red. The HSV color model takes the arguments (hue, saturation, value). saturation and value are both at their max of 255. We calculate the hue as a function of x. We do this with the map() function.
leds(0, 0) = CRGB::Red; // Set the pixel to RedFastLED.show(); // Tell FastLED to show your datadelay(1000); // Wait 1 second (1000 milliseconds)leds(0, 0) = CRGB::Black; // Turn the pixel offFastLED.show(); // Tell FastLED to show your datadelay(1000); // Wait 1 second (1000 milliseconds)
NOTE When you paste this into the starter code under // ...code here... , you’ll notice FastLED.show() gets called again after the pasted code. You can just leave that extra call in there. In this example, it doesn’t need to be called again after the last delay(1000), but it doesn’t hurt, and it’s easier to keep the same loop structure in place.
This code sets a single pixel to Red, tells FastLED to show that pixel, then uses the delay() function to pause for one second, then turns that LED to Black (off), show, pause.
int sinBeat = beatsin8(30, 0, 255); // 30 beats per minute, range 0-255for (int x = 0; x < WIDTH; x++) { for (int y = 0; y < HEIGHT; y++) { int hue = map(x, 0, WIDTH, 0, 255); // map the current x from 0-WIDTH to a hue in the range 0-255 leds(x, y) = CHSV(sinBeat + hue, 255, 255); // add a sine wave to hue to make it oscillate } }
This one creates a sine wave using beatsin8() to get a value that oscillates between a given range over “time” (ie. as the loop gets called over and over). It uses that sine wave to offset the hue, so that the hue at a given column is changing, creating the illusion that the whole picture is moving back and forth.
int sinBeat = beatsin8(30, 0, 255); // 30 beats per minute, range 0-255
The beatsin8 function is a FastLED beat generator which returns a sine wave in a specified Beats Per Minute, and with a specified low and high range for the output. The 8 stands for an 8-bit value, meaning the number can range from as low as 0 to as high as 255. The range of a hue is also 0-255 so we will utilize that whole range.
Let’s talk about why this sinBeat + hue part works.
The sinBeat variable we’ve already defined as a number oscillating in the range 0-255
The hue variable is calculated as a function of x and converted to a number in the range 0-255. So when x is 2, hue is 32 (red-ish-orange)
The sum sinBeat + hue is passed into the first argument of the CHSV function. According to the documentation, the hue variable is a type uint8_t - an 8-bit number from 0-255. (Unlike an int variable which can be anywhere in the range -2,147,483,648 to 2,147,483,647) So what happens if we pass in 256? It will wrap around to the beginning and turn into 0. This will always happen when you set any uint8_t variable to 256. Similarly 257 will be 1, 258 will be 2, etc.
Example: if we look at only the 3rd column of the grid, where x = 2, hue becomes 32 (red-ish-orange), then we add sinBeat which oscillates between 0-255, making the sum oscillate between 32-287, but 287 wraps around to 32. So the color at that columns is oscillating from red-ish-orange, to the end of the rainbow, wraps to the beginning, then to 32, then reverses all the way back.
I believe the best way to learn programming is to try changing the code, running it, and seeing what happens. Get curious about what would happen if you change this variable to that, move this line of code there, etc. And see what happens! Sometimes it looks terrible! Sometimes it turns out different than expected, and sometimes that even leads to a new idea. :) What designs can you create? What colors did you make up? What’s the RGB code for your favorite color? Can you make some animations?
I would LOVE to see your creations. Post them on Instagram and tag @mickymakes.art!
A few issues have been compiled on the Troubleshooting & FAQ page, which will be updated over time as feedback is collected on any additional issues users encounter.
If you’ve uploaded your own code to the Rainbow Clock and you want to go back to using it as a clock, this page will walk you through how to upload the original clock code: How to re-upload the original clock code